- Home
- Word Tips
Microsoft Word Tips for Academic Writing
I have compiled a list of Word tips that will help with your academic writing.
Each feature mentioned can be done in Microsoft Word.
They are:
- Tip 1 - headers
- Tip 2 - footers
- Tip 3 - page numbers
- Tip 4 - title page
- Tip 5 - table of contents
- Tip 6 - list of figures
- Tip 7 - list of tables
- Tip 8 - outline
- Tip 9 - citations
- Tip 10 - references
- Tip 11 - index
- Tip 12 - special characters
A good knowledge of Microsoft Word enhances your ability to create, format, and manage documents effectively, ultimately contributing to the overall quality and professionalism of your academic work.
Also, a strong knowledge of Microsoft Word extends its benefits beyond academia.
Effective communication, professional documentation, collaboration, and adaptability in various professional settings are some of the skills that will be valuable in your post-studies career and personal endeavors.
Sample Academic Paper
I have chosen a thesis at random from the University of Sydney's library. The content is not important to this discussion.
Have a look at this piece of academic writing (opens in new window). Do not worry about the content (unless you are interested in it).
Observe the following formatting features:
- The first page which is the title (or cover) page has no header, footer or page number. The information is what is required by the institution (Sydney University in this case).
- The header begins on the next page and continues through the rest of the document. However, note the header CHANGES at various sections of the document.
- The format of the page number changes from Roman numerals (i, ii, iii.....) to Arabic numerals (1, 2, 3.....) from Chapter 1 onwards.
- The spacing of lines
- The Table of Contents with nicely formatted headings, subheadings and with correct page numbers
- The List of Tables and List of Figures also nicely formatted with correct page numbers
- The headings and subheadings are numbered
- The mixture of portrait and landscape pages (for example, see page 69)
- The tables are nicely presented with data lining up
These are examples of some of the features of academic writing that Microsoft Word can assist with. The formatting and style depend on the institution you are writing for, but the examples are typical requirements of academic writing.
The following word tips will help you achieve academic success.
Headers
A header is the text and/or graphics that appear at the top of each page of your document. A piece of academic writing will have headers.
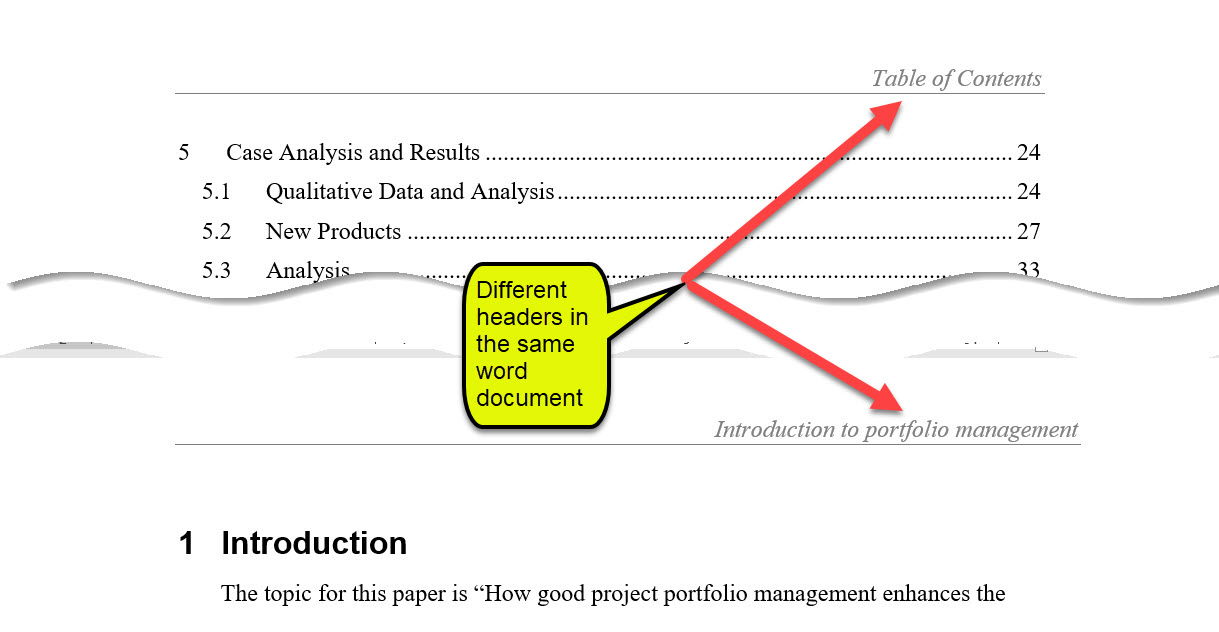 Word Tip - Know how to create different headers in the same Word document
Headers quickly remind the reader of the main topic of a page. Often, a reader will be concentrating on the detail of the page and lose track of the main topic that the page is part of.
All the reader must do is look at the header and remind themselves of the topic.
You only need to set it up once. You do not have to type it on each page.
A single header is easy to set up. But having just having one header is often not what you want.
Your document usually has several sections (or chapters or parts), and you may want a different header for each section.
You probably will not want a header on your title page.
But you may want to put a header on your Table of Contents page. And then you may want a different header for the first section of your paper. And a different header for the next section. And so on.............
Microsoft Word can do this for you.
Word Tip No 1 - Click (or touch) headers in Word to learn how to insert headers, including different headers in different parts of the document.
Footers
A footer is the text and/or graphics that appear at the bottom of each page of your document. A piece of academic writing may have footers, often with just the page number.
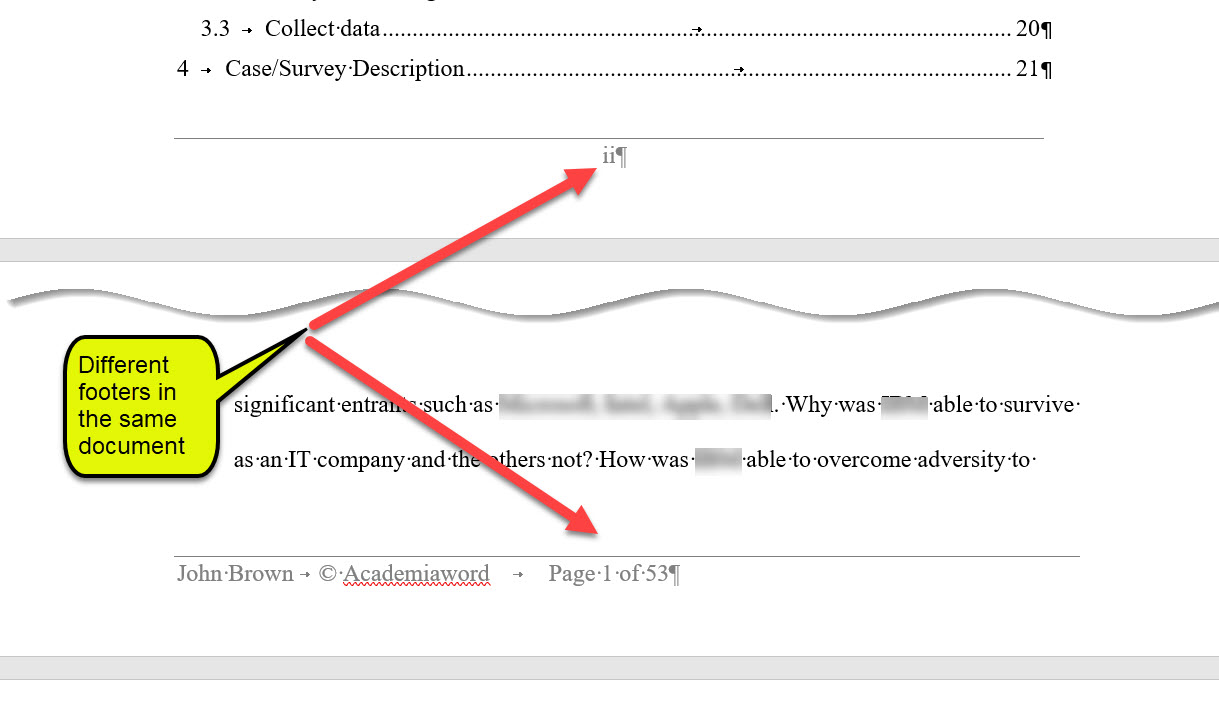 Word Tip - know how to create different footers in the same Word document
But it may contain other information such as the author, the date written or accessed or printed, copyright notices and version control information.
Footers quickly tell the reader important information about the document.
The reader can quickly glance at the bottom and see who the author is, or when it was written.
The copyright notice (if relevant) in the footer provides legal protection for the writer (or for the university or college).
And page numbers sometimes appear in the footer.
You only need to set up the footer once. You do not have to type it on each page.
A single footer is easy to set up. A footer will not change as much as a header in a document, but it still may change.
Maybe you will not want a footer on your title page or on your table of contents page. Microsoft Word can do this for you.
Word Tip No 2 - click (or touch) footers in Word to learn how to insert footers, including different footers in different parts of the document.
Page Numbers
Setting up page numbers is easy when using Word for academic writing.
If you are only interested in how to insert page numbers, go to page numbers in word.
If you would like a deeper understanding of page numbers (what, where, why, when), then read on. I find people are more likely to put page numbers in when they understand the reasons why.
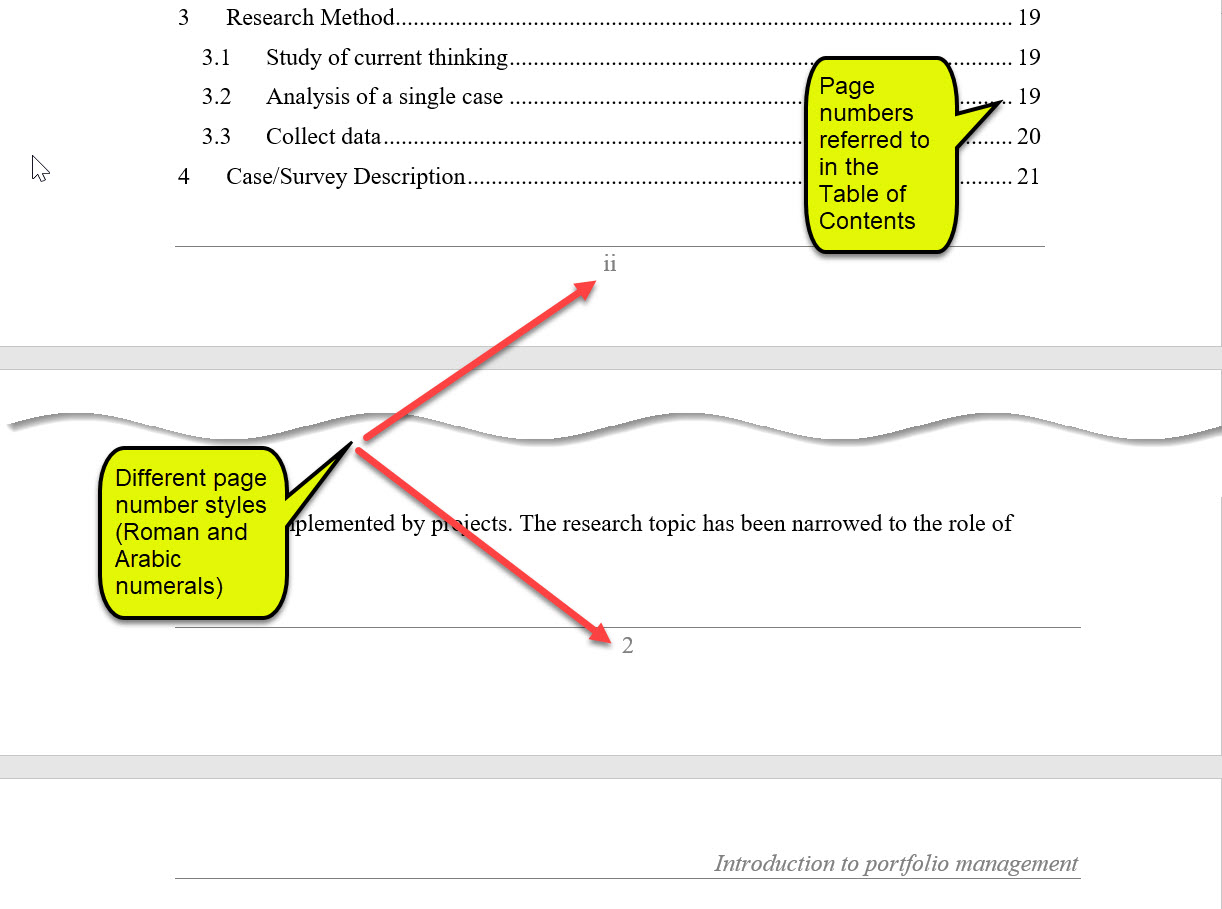 Word Tip - know how to create Roman and Arabic page numbers in a Word document
Page Numbers are numbers that appear on a page in a document.
A basic word tip is to know how to insert a page number.
However, often you will want to change the format of a page number in a document and not have simple page numbering starting at number 1.
The most common form are Arabic numerals (1, 2, 3, 4, 5 etc.) and Roman numerals (i, ii, iii, iv, v etc.).
Often you will need Roman numerals for the Table of Contents and Arabic numerals for the rest of the paper.
Word can automatically generate these (that is, you do not have to type these in). Do you know how?
Page numbers may appear on every page of a document, or some of the pages (sometimes the Title page, the Table of Contents page and other pages do not have page numbers).
Page numbers often appear at the bottom of the page but sometimes at the top.
Page numbers may always be in the same position on the page, or the position can vary (have a look at a published book!).
You can set up Microsoft Word to put the page numbers where you want.
The following are reasons for having page numbers:
- Page numbers provide a quick accurate reference point.
e.g., "on page 251 you will find..." - you can go there immediately
e.g., the Table of Contents tells you the Summary is on page 300 - you can go there immediately
e.g., a citation or reference will refer to page 51 of another published work - you can find that publication and go to that page immediately. - Reassembling a printed document
Have you ever had to put together a number of pages that are out of order - maybe by spreading all over your desk or even dropping a document?
It is much easier to reassemble using page numbers! - Following standards
Academic institutions require you to follow a standard (e.g., MLA, APA, Chicago, Harvard or their own) that requires page numbers. - Helps to make your work look professional
The reader of your document (e.g. professor, teacher, lecturer, student) will have a higher opinion of you.
This should help you succeed!
Do online documents require page numbers? The answer is no. Navigation (i.e. getting around) can be done by hyperlinks (i.e. clicking on a link which takes you elsewhere).
However, Microsoft Word automatically numbers your pages, but the page number does not appear on the document itself unless you instruct Word to put it there.
Also, Word has a "Go To" function that allows you to go to a page number.
And many people in academia (e.g., lecturers, teachers, students) like to print on paper.
So, if there is any chance of your document being printed, you should insert the page number (as well as being an academic writing standard that requires you to do it).
When to have page numbers in your document?
Always!
Put your page numbers in - even at the first draft stage.
I have received academic papers for editing without page numbers.
It is difficult to query the writer or make comments without referring to a page number.
Word Tip No 3 - Click (or touch) page numbers in Word to learn how to insert page numbers, including differently formatted page numbers in different parts of the document.
Title Page
A piece of Academic writing often requires a Title Page, sometimes called a Cover Page or a Cover Sheet. The purpose of the Title Page is to provide basic information about the academic paper that you have written.
 Word Tip - know how to create a Title Page
The information required varies among universities and colleges according to their academic writing standards.
You should know what your institution's requirements are (if not, ask your professor, lecturer or teacher).
However, typically for academic writing, you will find information such as:
- University or College logo
- Title of the paper
- Author
- Date
- Course
- Subject
- Assignment/Topic
- Student Number
- Word Count
- Signature
If you are using MS Word, some templates for a cover sheet are provided.
However, often your institution will have a standard to follow, and you will have to create your first page as a Title or Cover Page.
The Title Page will have a different format (or layout) to the rest of the paper.
For example, often there is no page number on the Title Page, as in the example here. However, the APA standard does require a page number on the Title Page (in the header).
Do you know how the title page should be formatted for your academic writing?
Word Tip No 4 - learn how to create a title (or cover page) in your academic paper with the correct information.
Table of Contents
A Table of Contents (sometimes called Contents or TOC) is a list of the main topics (or chapters or sections) of a document and their page numbers. It is located after the Title Page and before the main writing.
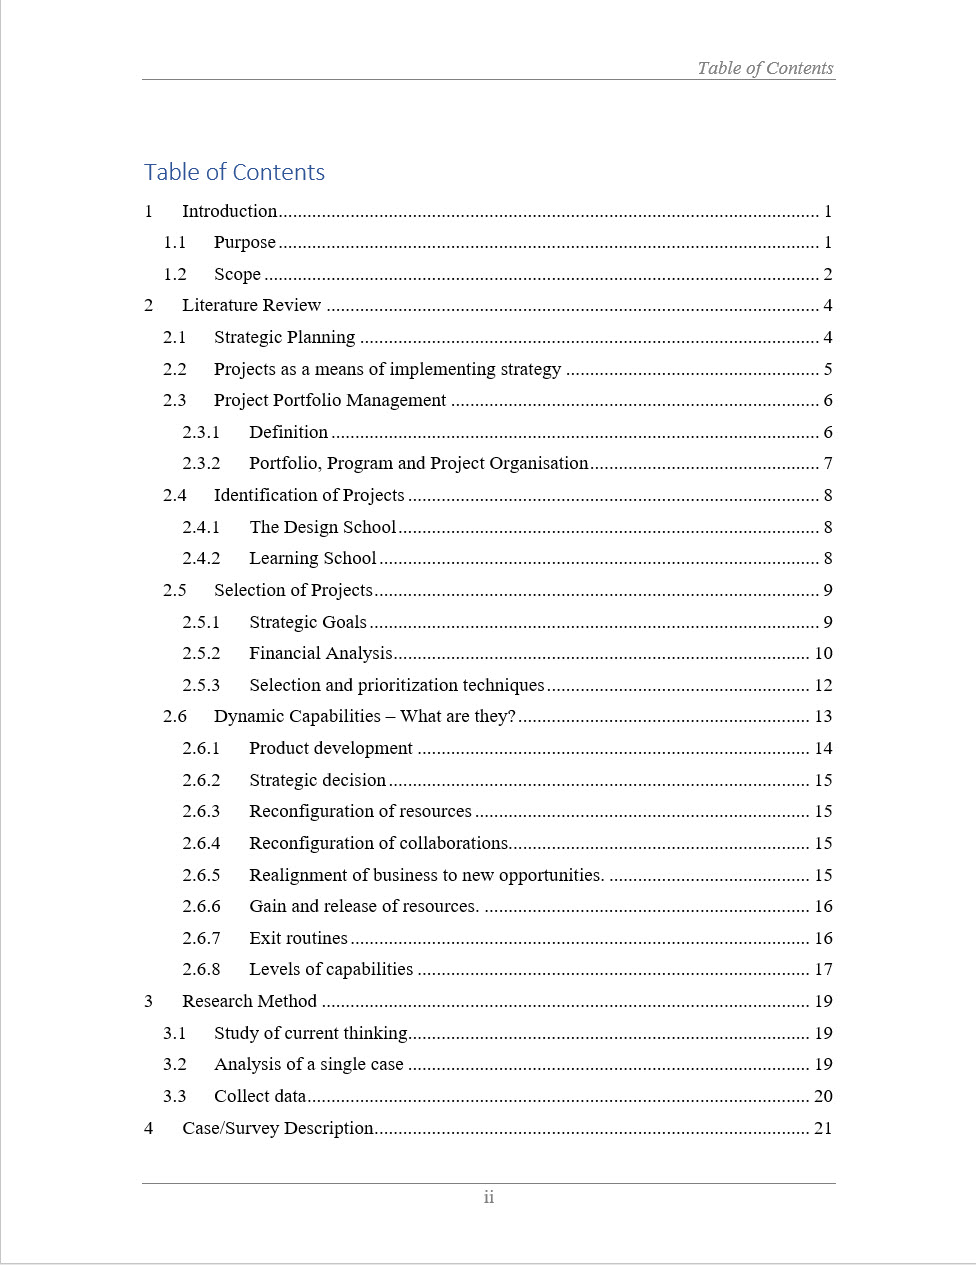 Word Tip - know how to create a Table of Contents page
The Table of Contents, tells at a glance, what the work is about and the structure of it.
It tells you what page number the topic (or subtopic) is to be found - hence the importance of page numbers.
When I look at an unfamiliar piece of work (e.g. academic paper, book), I first look at the Table of Contents to see what it is about.
You could create the Table of Contents yourself - you could enter the topic names and their page numbers. But this is quite time-consuming.
Imagine having to do that - especially in a long complex piece of academic writing!
And more troubling is if you make a change, such as, add a page, then all your page numbers are thrown out and you have to retype the whole lot.
That is a whole lot of work! And easy to make a mistake!
Fortunately, if you are using Microsoft Word for your academic writing, the Table of Contents can be created automatically and then you can instruct Word to automatically update if you have made changes.
This saves you a lot of time and removes the risk of errors. It is worth learning how to use this Word feature properly.
Word Tip No 5 - learn how to create a Table of Contents automatically in your document.
List of Figures
A List of Figures is quite common in academic documents (as well as books) where there are several or many figures. Figures are images that include graphs, drawings, maps, photographs and others. A figure is attempting to give information visually instead of using words.
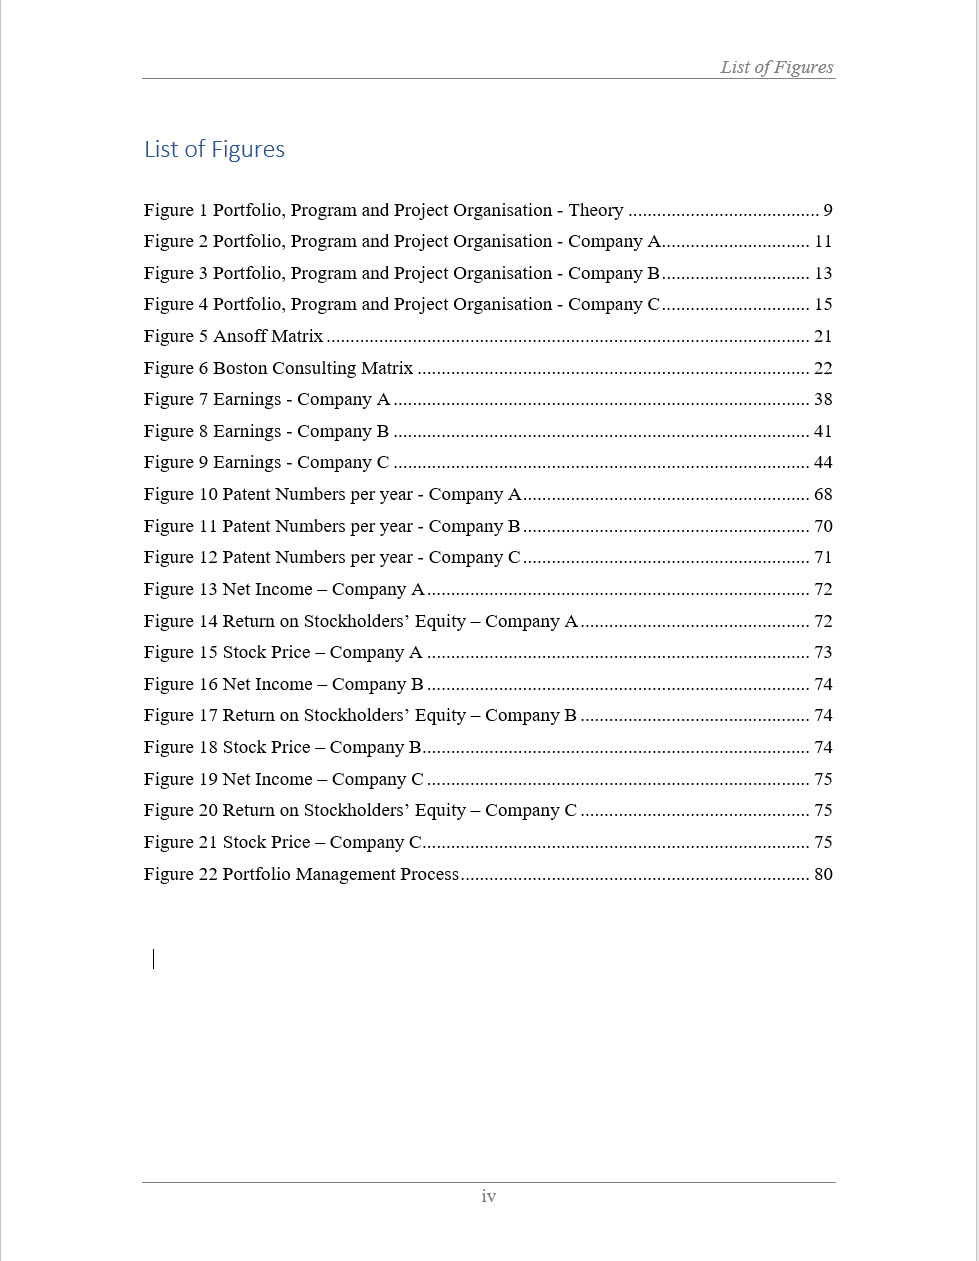 Word Tip - know how to create a List of Figures
A List of Figures is often found in longer pieces of academic writing such as a thesis, dissertation or a complex report.
A figure (e.g., graph, drawing) is a pictorial representation of information that often contains a lot of numbers or data. It would be very awkward to describe the content in words.
For example, describing the location of Germany in relation to other European countries is so much easier done through a map rather than trying to describe in words.
Another example is when using a lot of data to show a trend such is increasing or decreasing profits over several years.
Yet another example is when comparing performance, such as profit, among a group of companies over a period.
As the old saying goes "a picture is worth a thousand words".
A university or college may require a List of Figures as part of their academic writing standards.
Even if they do not, a List of Figures is useful if there are a larger number of figures and/or the document is lengthy.
The function of the List of Figures is the same as for a Table of Contents - to direct the reader quickly to a piece of information.
For example, after having read the document (on paper or online), the reader may want to revisit some information in a figure. Looking at the List of Figures would quickly direct the reader to that figure.
Also, a scan of the List of Figures will alert the reader to something interesting for that person. I often look at the List of Figures (as well as the Table of Contents) to see if there is anything of particular interest to me.
Just like for the Table of Contents, if you are using Word for your academic writing, the List of Figures can be created automatically and then you can instruct Word to automatically update if you have made changes.
Not only is the List of Figures updated, but the Figure Numbers in the Captions are updated.
This means if you add or delete a figure, Word will automatically change every other Figure Number.
This saves you a lot of time and removes the risk of errors. It is worth learning how to use this Word feature properly.
Do you know how to create a List of Figures automatically, that is, have Word do it for you?
Word Tip No 6 - learn how to create a List of Figures automatically in your document.
List of Tables
A List of Tables is quite common in academic documents (as well as books) where there are several or many tables. This information is given in a tabular form because it is too difficult to describe in words and if it were, the reader would become lost in trying to understand it.
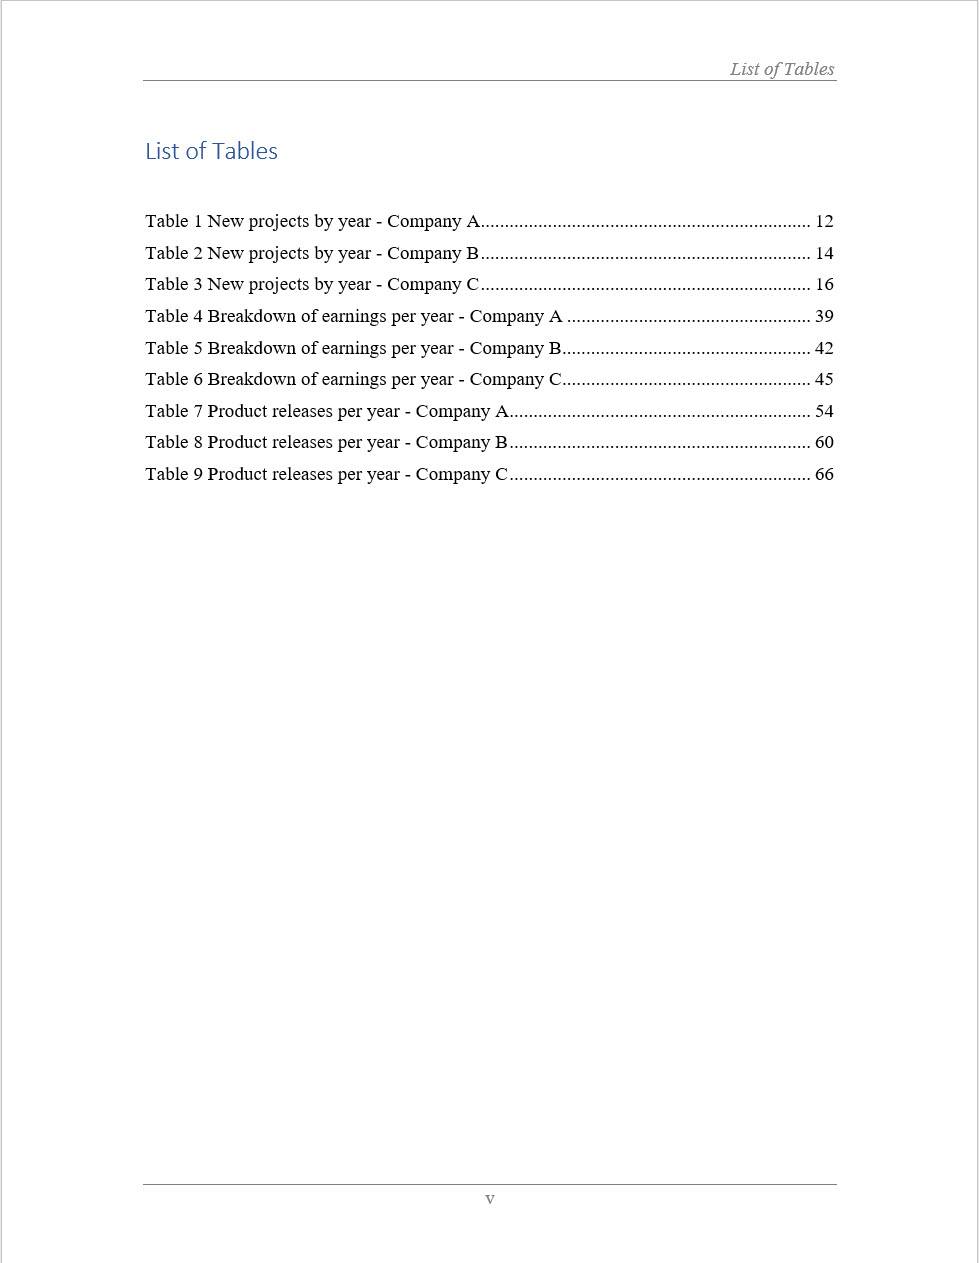 Word Tip - know how to create a List of Tables
A List of Tables is often found in longer pieces of academic writing such as a thesis, dissertation or a complex report where there are several tables.
A table presents data (usually numbers) in rows and columns, just like a spreadsheet.
A table shows precise values. Compare this with a figure which shows trends and comparisons but not data at a detailed value.
For example, consider a figure that shows a trend of increasing or decreasing profits over a number of years for a company.
If you wanted to provide more precise details of profit figures and further breakdowns such as quarterly results, a table would be used.
This is the representation of data that is easiest for the reader to understand.
A university or college may require a List of Tables as part of their academic writing standards.
Even if they do not, a List of Tables is useful if there are a larger number of Tables and/or the document is lengthy.
The function of the List of Tables is the same as for a List of Figures and a Table of Contents - to direct the reader quickly to a piece of information.
For example, after having read the document (on paper or online), the reader may want to revisit some information in a table. Looking at the List of Tables would quickly direct the reader to that table.
Also, a quick look at the List of Tables will alert the reader to something interesting for that person. They can then go directly to that table.
Just like for the Table of Contents and the List of Figures, Word can create a List of Tables automatically and then you can instruct Word to automatically update if you have made changes.
Not only is the List of Tables updated, the Table Numbers in the Captions are also updated.
This saves you a lot of time and removes the risk of errors. It is worth learning how to use this Word feature properly.
Do you know how to create a List of Tables automatically, that is, have Word do it for you?
Word Tip No 7 - learn how to create a List of Tables automatically in your document.
Outline View
You can view your piece of academic writing in several ways in Word. Most commonly you would use the Print Layout view. The Outline view gives you a high-level view of the document, that is, the structure.
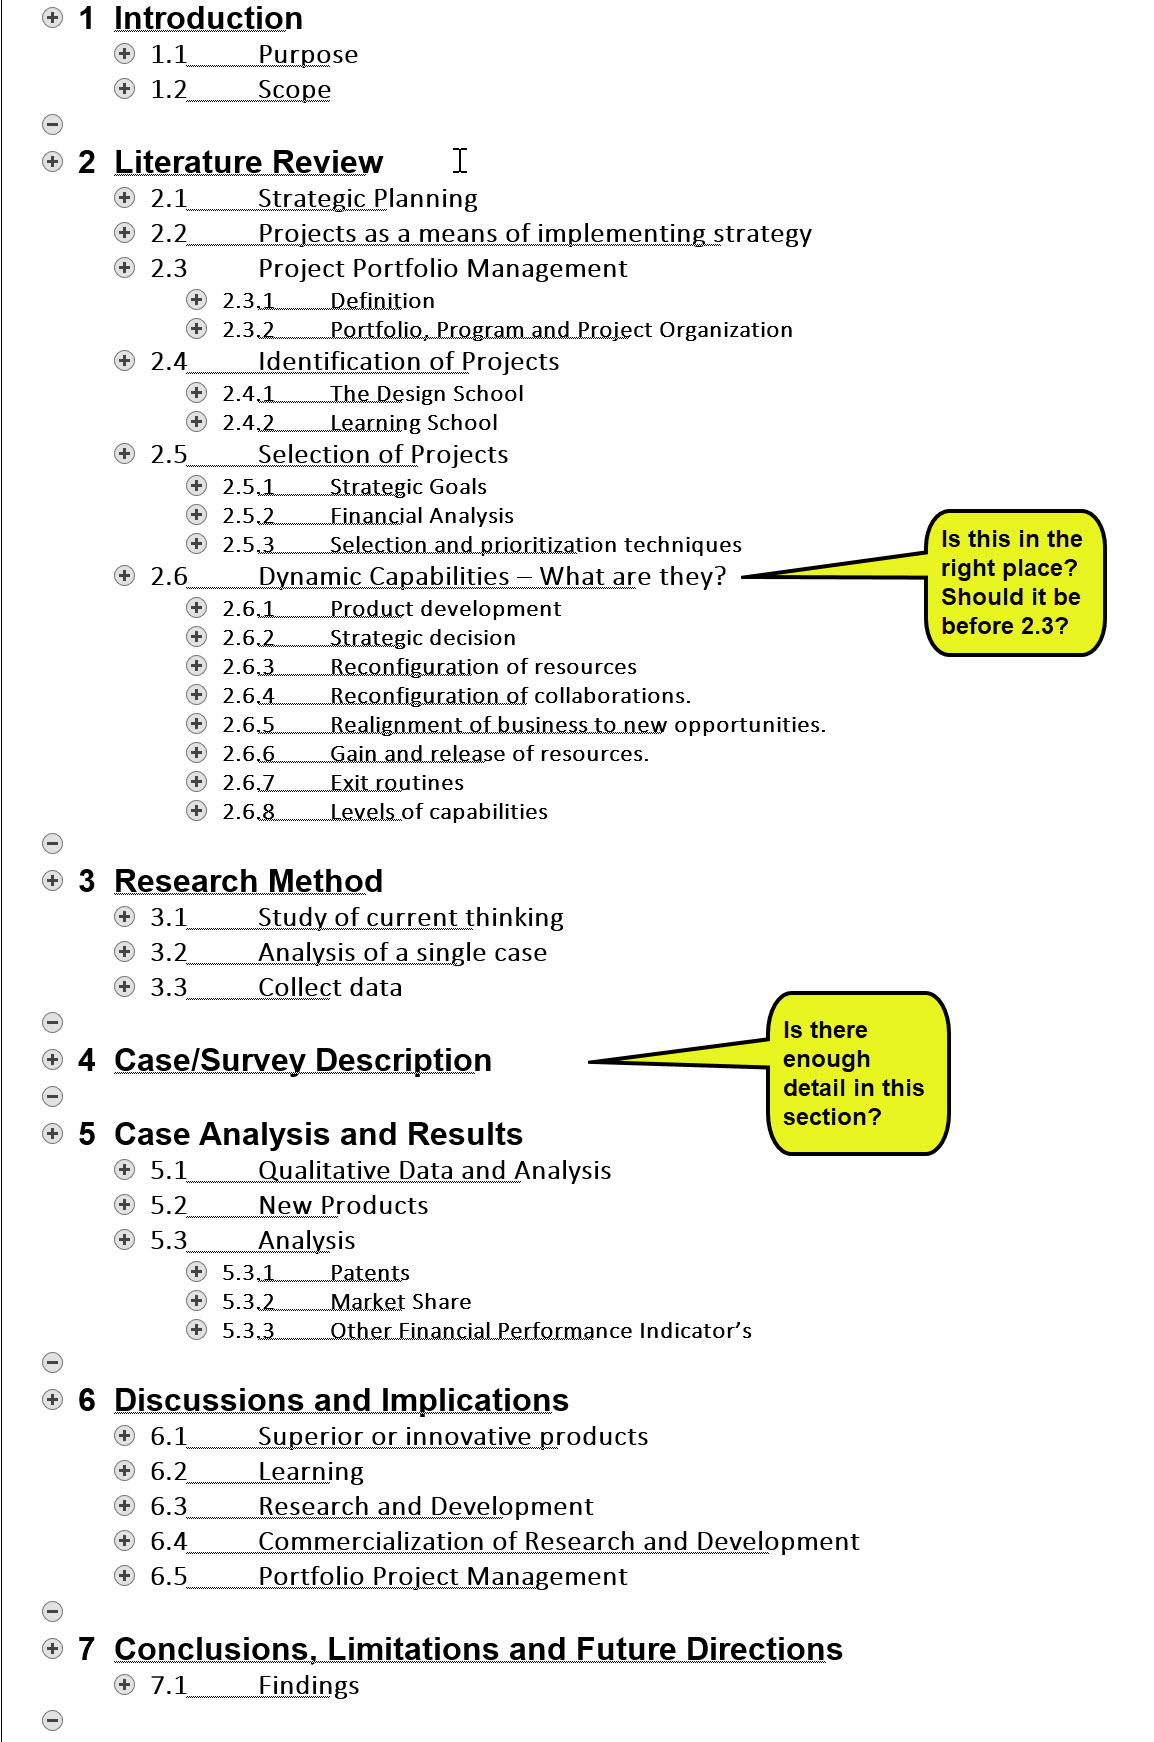 Word Tip - know how to use the Outline view to better your Academic writing
In my opinion, the Outline view is greatly underused but is one that can provide great benefits in your writing.
The Outline displays the levels of the document (the Heading 1 style being level 1, Heading 2 being level 2, Heading 3 being level 3 and so on). Each level shows the subordinate levels.
You can specify the number of levels to be shown - in my example, I show three levels.
The Outline view can be used in two ways - planning and review.
Good academic writing practice (and common sense!) says you should plan before you write, once you have done all the research required and collected the data.
You can plan the structure of your academic document in Outline view by entering Level 1s, Level 2s and more depending on how many levels you want.
Nothing is set in concrete. You can add, delete and move around. Even when you have written more detail, you can still add, move or delete as you wish.
Looking at your academic paper at this high level will allow you to determine if the paper flows logically - if it is rational and makes sense. Is it complete? Are there gaps? Is there redundant information?
You may not believe it now but proper planning at this stage will save much time later in rewrites and restructure, which often occurs when proper planning is not undertaken.
If you have a supervisor, why not show them the outline at an early stage? Valuable input into the structure could be gained at this stage.
You can also review your academic paper at any time - even after the first and subsequent drafts.
You are reviewing the same things as before - do the evidence, arguments and conclusions flow nicely? Is it rational and does it make sense? Is it complete? Are there gaps? Is there too much information?
You can easily move sections and subordinate information around in the Outline view. You can add or delete sections.
I believe you will save a lot of time as well as improve the quality of your academic writing by making good use of the Outline view.
Word Tip No 8 - learn how to use the Outline view to make your academic writing even better.
Footnotes, Endnotes and Citations
Your academic writing will very likely use external sources for information. In your research, you will use access media such as books, journals, articles, websites, and several other types of media that may be referred to depending on the field of study you are involved in.
It is important that you acknowledge in your academic writing the author (or authors) of your source. The main reasons are:
- to avoid plagiarism. Plagiarism is not acknowledging your source of information and is regarded as cheating because it gives the impression the idea or information is your original work. All academic institutions have policies about plagiarism and penalties - which can range from deduction of marks to failure.
There is nothing wrong with using other people's work.
You just must acknowledge it! - to help the reader go to the source (book, journal, article etc.) and read it if they want further information
- it shows your assessor (professor, lecturer, teacher etc.) you have read and researched widely.
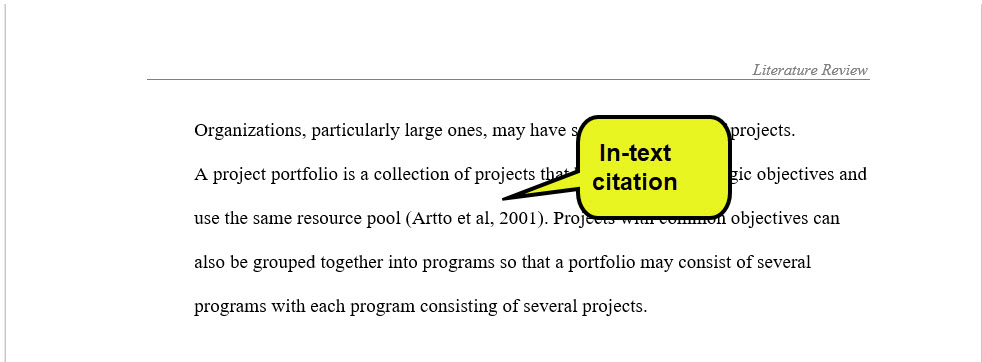 Word tip - know how to cite your sources in-text
In-text citations is a common method of acknowledging a source where you have quoted or paraphrased (that is, written in your own words) someone else's idea or information.
The author-date system is often used. As the name suggests, you specify the author (or authors) and date of publication (the year).
A complete description of the work (for example, author(s), date, title, publisher and place of publication if it is a book) is placed in a list usually at the end of the writing. This list is titled as References or Bibliography or Works Cited.
The format of the description of work varies depending on the source - most common are books and journal articles but there are a range of other sources such as websites, newspaper articles and studies.
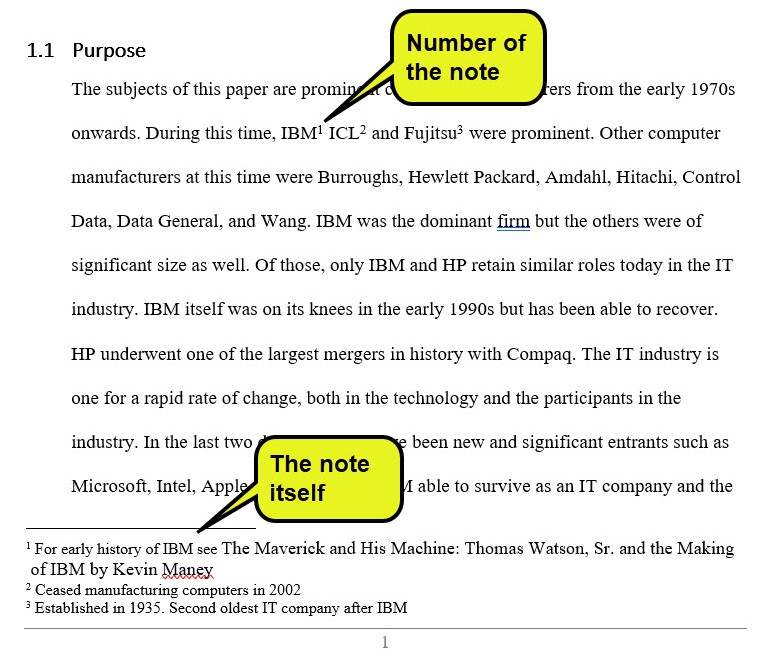 Word Tip - Know how to cite your sources using the note system
Footnotes are another way of acknowledging your source of information.
Instead of referring to the author and date in the writing itself, a number is placed in that location. Then at the bottom of the page, the reference (for example, the author and date) is placed against that number.
The full reference is given in the list at the end of the writing (that is, the References or Bibliography or Works Cited).
The method of citation you use (in-text or footnotes) will be given to you by the academic writing standard used by your education institution.
Footnotes are also used in another way, and that is to provide additional information which is not of primary relevance to your writing but may be of interest to your reader.
Footnotes are easily created in Word. The advantage of using Word to create footnotes (instead of entering numbers yourself) is that Word maintains them.
This means that if you add a footnote among other footnotes, or delete a footnote, all the numbers will be automatically renumbered.
Endnotes are a variation of footnotes. Instead of having the note at the bottom of the page, the note is at the end of a section such as a chapter.
The advantage of the footnote is that it is close to the numbered reference in the text (that is, on the same page). However, if you have a lot of notes, or lengthy notes, there is not enough space in the footer, in which case, you may use endnotes.
Once again, your institution will have a standard on how to use footnotes and endnotes.
Word Tip No 9 - learn how to create citations, in-text, footnotes, or endnotes as appropriate.
Reference List, Works Cited and Bibliography
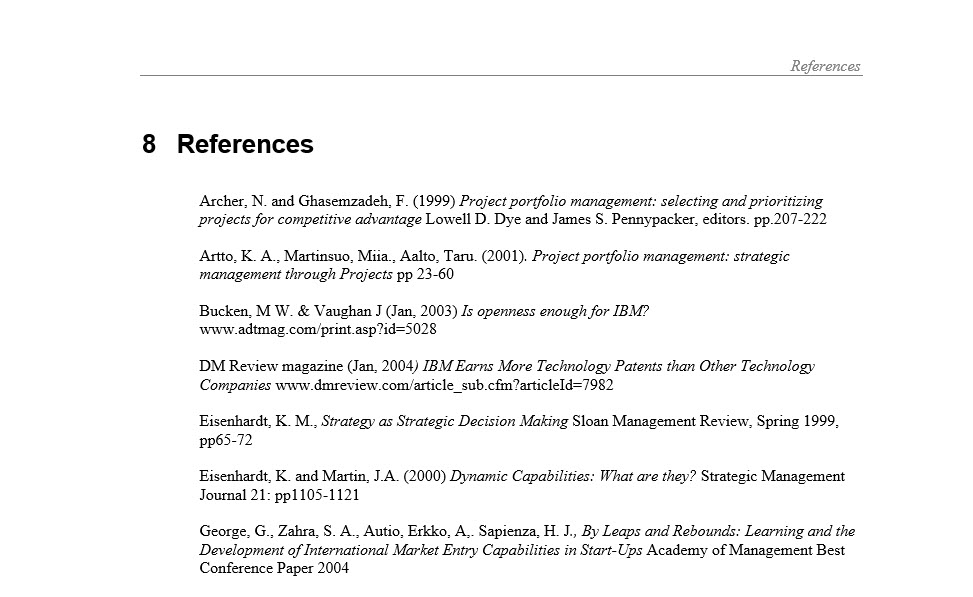 Word Tip - Know how to create the Reference list (or Works Cited or Bibliography)
The detailed reference information is provided in a list, known as References or Bibliography or Works Cited.
All sources referred to in your paper should be in your list. Your citation in your paper provides brief information, such as author(s) and date.
Detailed information about the source is provided in the Reference (or Works Cited or Bibliography).
You will be guided by your education institution's standards as how to title the list.
Some institutions require you to include only those sources cited in your work in a Reference list.
Others may require you to include those sources in a Reference list, and other works read but not cited in a Bibliography.
Others may require you to include both types (cited and not cited) in a Bibliography.
And if you are using the MLA standard, the title will be List of Works Cited. Confusing - isn't it!
But don't worry - follow the standard of your university, college, or school and all will be good.
Word Tip No 10 - learn how to create the Reference or Works cited list or the Bibliography.
Index
Indexes (or indices) are used to direct the reader to a page for a particular topic, sub-topic or even an individual word or phrase. Indexes are common in academic books but may also be required for a thesis or dissertation. Check with your educational institution for requirements.
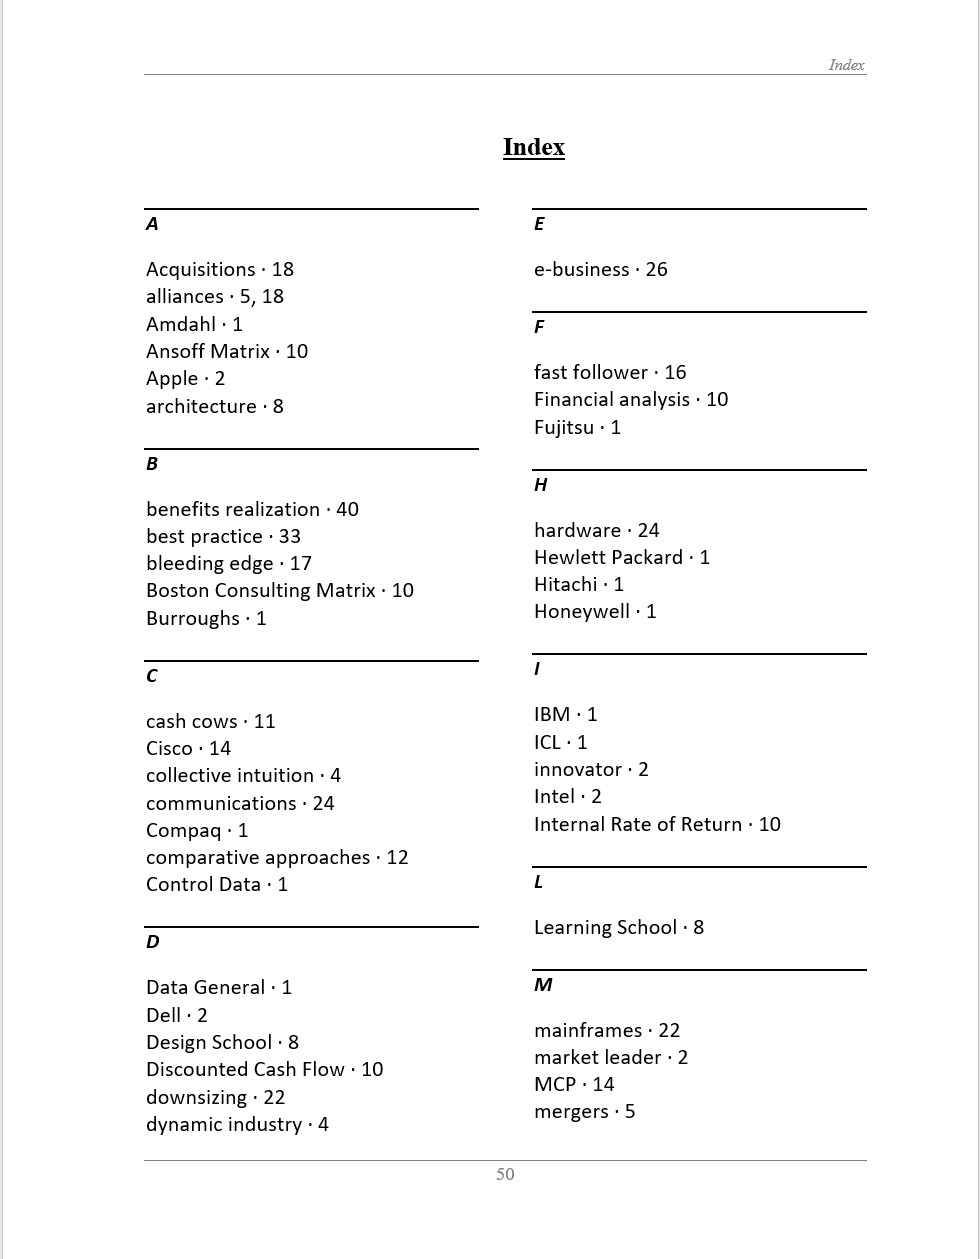 Word Tip - know how to create an index
Even if it is not required for your thesis or dissertation, I believe there are advantages in knowing how to create one, and actually creating one.
If you are using Word for your academic writing, creating an index is easy - just highlight the word/phrase as being part of an index. Then build the index at the end of the document.
But there is more to this if you want to create a good index.
Do not create the index until you have completed the paper. Then go through carefully and select the words or phrases to index.
This process of selection will make you think about the structure and content.
Have you omitted an item that should be present?
Have you emphasized something too much and something else too little? Is the balance correct?
Often many things become apparent that you didn't see before.
I use indexes quite a lot when they are available, particularly in text and reference books. I look for a particular item to see if it is in that publication.
For example, I have picked up a paper and want to know if it has anything about the "Boston Consulting Matrix". Looking at the sample index I can see it is on Page 10 - a quick and useful way of finding it.
Of course, if it is online, you can use the Search function.
I think creating an index is a useful skill to have, especially if you have ambitions of writing a text for publication.
Word Tip No 11 - learn how to create an index in your document.
Special Characters
En Dash
An en dash is used to show a numerical range, for example, (pp. 19–51).
It is different to a hyphen or minus sign on your keyboard.
See how to create an en dash in Microsoft Word.
Summary - Word Tips
All of the above word tips could be done without using the in-built functions of Microsoft Word.
For example, you could type the page number at the end of each page (some people do!). But apart from the extra time, what if you insert a new page later on? You have to redo all subsequent page numbers.
Or you could type in the Table of Contents yourself.
But this is so TIME CONSUMING!
And also you will have ERRORS as it easy to forget to update when changes are made.
The best Word tip I can give is to use the above functions (and others) of Microsoft Word that automate various processes.
If you take note of the Word tips described above, you will SAVE TIME, look MORE PROFESSIONAL and get BETTER RESULTS with your academic writing!
Your academic success will be helped by using Microsoft Word efficiently.
Like This Page? Please Share It.